TL;DR: GeekLink's OCR used to make you draw a box over the subtitle area yourself and guess where the text was. It doesn't anymore. Now it scans the video, detects each subtitle line for you, and pre-fills the language on every line. You just look at what it found and confirm — delete a line if it picked up a station logo, or drag a box to add a line it missed. There's a deep-scan option for tricky videos where the subtitles are sparse, and everything still runs locally on your computer and exports to editable SRT. This all shipped in GeekLink 0.4 — which is also the release where we dropped the beta label.
What Are Hardcoded Subtitles?
Hardcoded subtitles — also called burned-in subtitles or hard subs — are text painted permanently into the video image. You can see them, but there's no separate subtitle file, you can't switch them off, and you can't select or copy the text. They're everywhere: anime rips, Chinese short dramas, K-pop fancams, Douyin and Bilibili reposts, and older TV captures. If you want an editable, translatable subtitle file out of one of those, you need OCR to read the text back off the frames.
The Old Way: Draw a Box and Hope
Until recently, GeekLink asked you to do the finding. You'd scrub to a frame with subtitles on screen, draw a box over roughly where the text sat, and hope you'd covered the right area for the whole video. Draw it too small and you'd clip the ends of longer lines; too big and you'd pull in a station logo, a watermark, or on-screen signs that aren't subtitles at all. It worked, but it put the hardest judgment call — where exactly are the subtitles? — on you, before you'd even started.
The New Way: GeekLink Detects the Subtitle Lines
Now GeekLink does that part for you. When you open a video for OCR, it samples across the clip and comes back with the subtitle lines it found — drawn right on the preview frame — instead of an empty box waiting for you to fill it. Each detected line arrives with its language already pre-filled (Chinese, English, Japanese, Korean, and so on), because it reads a sample of the text to guess it, so you're not setting that by hand either.
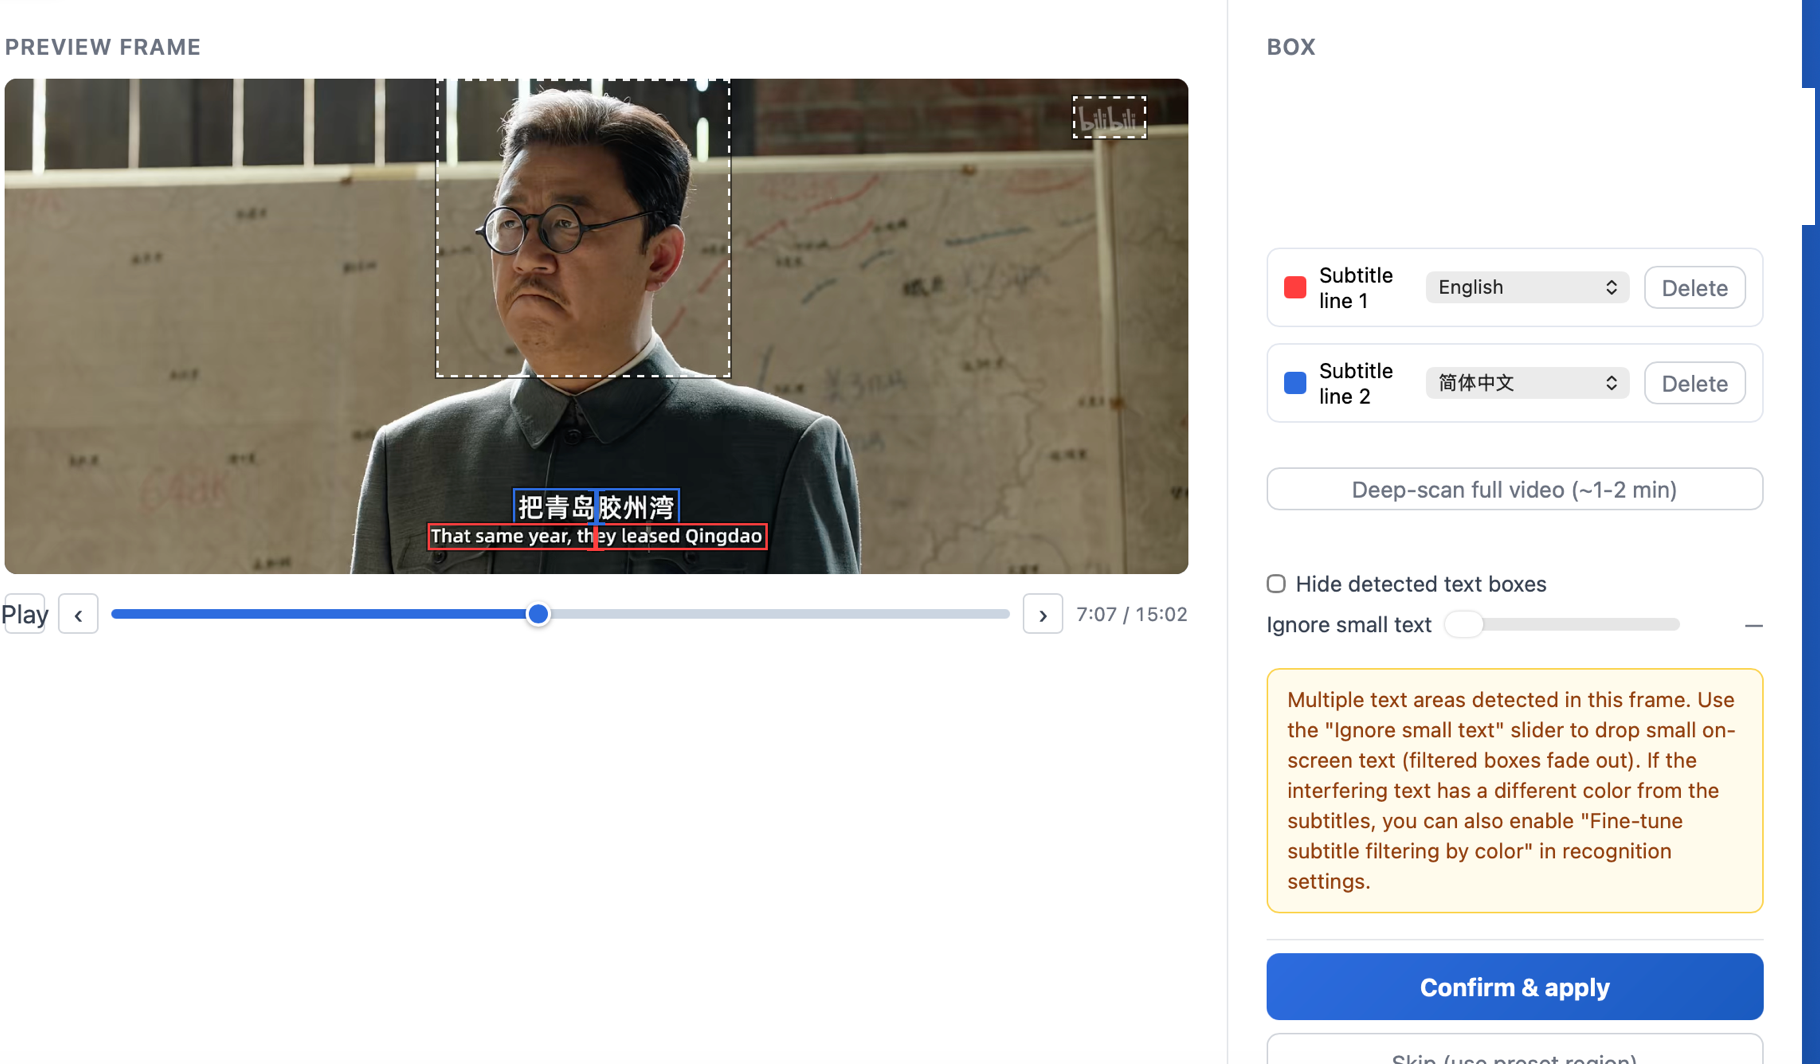
On a bilingual video, it typically comes back with the two lines you'd expect — the original and the translation — each labeled with its own language, so a Chinese-over-English clip gets read as two separate tracks rather than one mush. Your job shrinks to a glance: are these the lines I want? If yes, you confirm and it starts.
Logos, Watermarks & Missed Lines
Automatic detection isn't magic, and we didn't pretend it is — so the controls for fixing it are right there:
- It picked up a logo or watermark? Detection sometimes flags a bug logo or a channel watermark as if it were a subtitle line. Just hit Delete on that line and it's gone — it won't be read.
- It missed a line? You don't need a special mode or an "add line" button. Just drag a box straight on the preview where the missing subtitle sits, and it becomes a new line — sized exactly to what you drew, nothing extended.
- Wrong language on a line? Each line has its own language dropdown, so if a guess is off you change it on that line without touching the others.
Tricky Videos: Scan the Whole Clip
The quick detection samples frames to stay fast, which is the right call for most videos where subtitles are on screen almost constantly. But some clips are sparse — long stretches with no text, subtitles only in a few scenes — and a quick sample can miss those. For those, there's a deep-scan option that walks the whole clip instead of sampling, so sparse lines still get found. It takes longer, so it's opt-in rather than the default, but it's there when a video needs it.
Then: Edit and Batch-Export
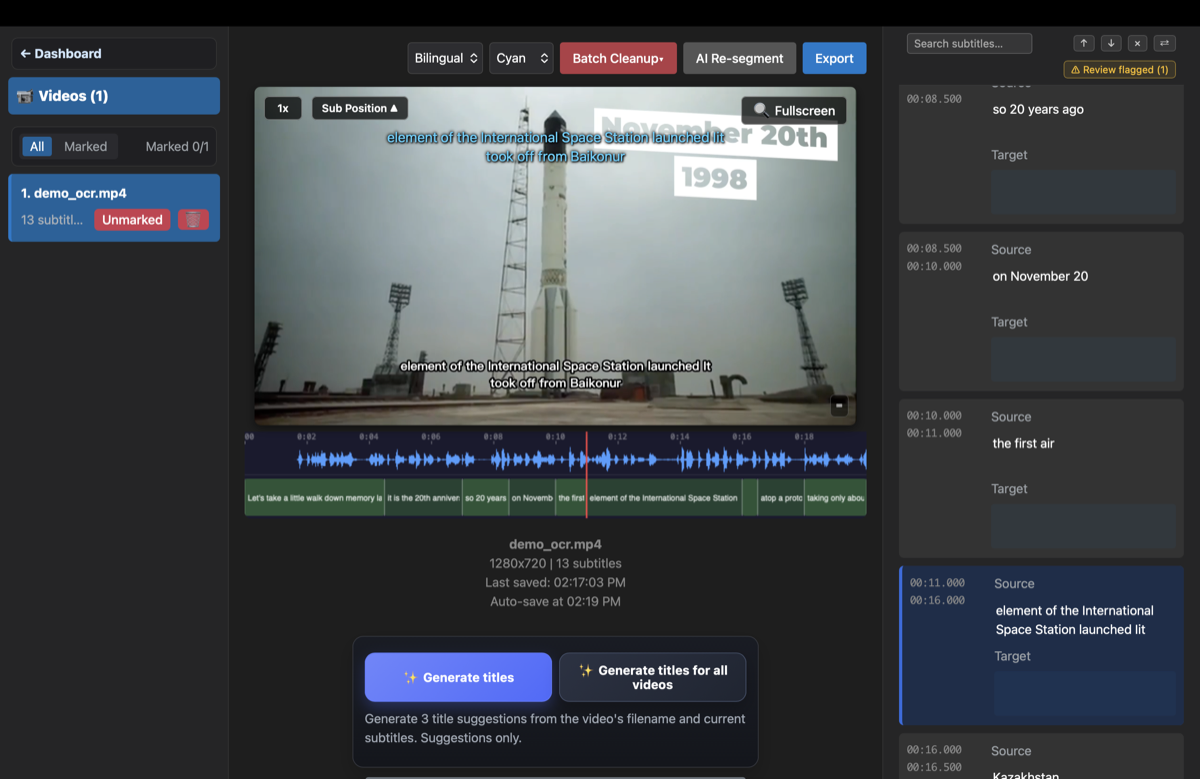
Once you confirm, OCR reads the text off the frames into a time-synced subtitle file — it detects when each line appears and disappears, so the timing comes out aligned, not just the words. From there it's a normal editable subtitle: fix anything that needs fixing in the editor, and export to standard .srt that opens in any subtitle editor — Subtitle Edit, Premiere, Final Cut. Imported a folder of episodes? It queues every one and batch-exports a file per video.
GeekLink 0.4 Is Out of Beta
One more thing worth saying plainly: this is the release where GeekLink stopped being a beta. We'd carried the beta label since the start of the year while the core pipeline — OCR extraction, speech recognition, AI translation, and burn-in — took shape and got hammered on by real users on real footage. With 0.4, that pipeline was solid enough that we dropped the beta label. Windows arrived in steps after that: 0.4.4 brought OCR-only support to Windows, and 0.4.5 completed the Windows build with speech recognition, OCR, AI translation, editing, batch export, and burn-in.
If you tried an early beta and bounced off a rough edge, the OCR flow above is a good reason to give it another look — the part that used to ask the most of you is the part that now does the work for you.
FAQ
How do I extract hardcoded (burned-in) subtitles on Mac or Windows?
Import the video into GeekLink and choose OCR. It scans the clip and detects the subtitle lines for you, each with its language pre-filled. Confirm the lines it found — deleting any that are actually a logo or watermark, or dragging a box to add one it missed — and it reads the text off the frames into an editable, time-synced SRT file. Everything runs locally on your computer.
Does GeekLink find the subtitle area automatically, or do I draw the box myself?
Automatically. GeekLink samples across the video and comes back with the subtitle lines it detected, drawn on the preview frame. You only draw a box manually if you want to add a line it missed — the automatic detection handles the normal case.
What if there's a station logo or watermark in the frame?
Detection sometimes flags a logo or watermark as a subtitle line. You just delete that line before confirming, and it won't be read. You can also fine-tune subtitle filtering by color in the recognition settings if interfering text is a different color from the subtitles.
Can it read two languages at once, like a Chinese-over-English video?
Yes. On a bilingual clip it typically detects both lines separately — the original and the translation — each labeled with its own language, so they come out as two tracks rather than one merged line. Each line's language can be changed individually if a guess is off.
What if the subtitles only appear in a few scenes?
Use the deep-scan option. The default quick detection samples frames to stay fast, which suits videos with near-constant subtitles. For sparse clips — long stretches with no text — deep-scan walks the whole video instead of sampling, so it still finds the lines. It's slower, so it's opt-in.
Is GeekLink still in beta?
No. As of version 0.4, GeekLink has dropped the beta label. The core pipeline — OCR, speech recognition, AI translation, and subtitle burn-in — is considered stable. Windows support arrived in two steps: 0.4.4 was OCR-only, and 0.4.5 is the first Windows build with the full subtitle workflow.
Is extracting hardcoded subtitles free?
You can get 60 minutes of free OCR export every month.
Disclosure: GeekLink is our own product. This post describes how the current OCR flow works in version 0.4; the screenshots are from the app.